To take a baby passport photo at home for a U.S. application, place your baby on their back on a smooth plain white or off-white sheet, use even light without facial shadows, photograph the full face looking toward the camera, and keep every other person out of the final frame. Submit one recent, clear, unedited color photo. For a printed paper application, the finished photo must be exactly 2 × 2 inches.
This guide covers United States passport-photo rules current on September 4, 2026. It does not cover visa photos, another country's passport or every part of a child's application. Requirements change and countries use different sizes, expressions and file specifications, so check the issuing government's official page immediately before applying.
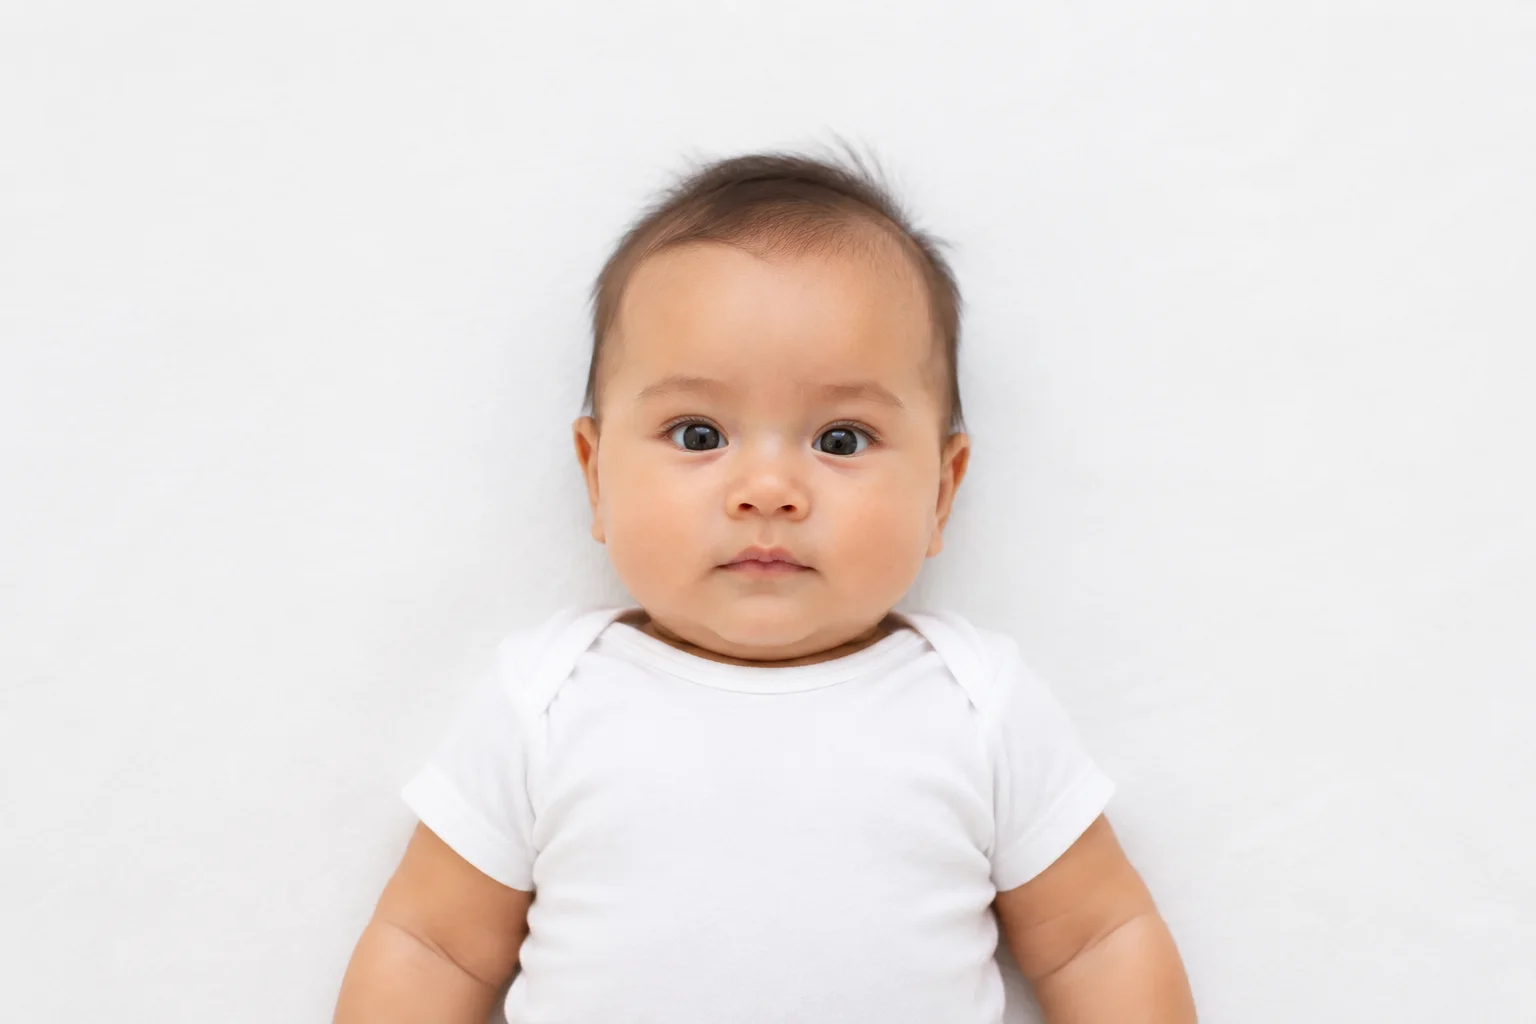
U.S. baby passport photo requirements at a glance
The U.S. Department of State's current official passport photo requirements and examples are the final reference. Its child examples make a limited allowance for infants: a baby's eyes do not have to be entirely open. The rest of the composition still matters.
| Requirement | What to submit | Home check |
|---|---|---|
| Age of photo | Taken within the last six months | Use a new image that reflects the baby's current appearance |
| Color and clarity | Clear color photo with accurate skin tones | Eyes, face outline and hair are in focus; no blur or heavy noise |
| Background | Plain white or off-white, without shadows, texture or lines | No blanket pattern, wall edge, toy or visible support person |
| Face | Full face visible and directed toward the camera | No pacifier, hand, hat, toy or hair across the face |
| Expression | Neutral expression with mouth closed; infant eyes may be not entirely open | No exaggerated expression; older children need eyes open |
| Printed size | 2 × 2 inches (51 × 51 mm) | Head is centered and 1–1⅜ inches (25–35 mm), chin to top |
| Digital changes | Original, unchanged photograph | No filter, AI, face edit or digitally replaced background |
The U.S. Department of State decides whether the submitted photo is acceptable. A home checklist improves your odds, but no app, photographer or website can guarantee approval.
How to take a baby passport photo at home
1. Build a plain, floor-level setup
Choose a firm, stable surface at floor level and pull a clean white or off-white sheet smooth over it. The sheet must appear plain in the photograph: avoid quilting, wrinkles that look like lines, obvious texture and colored objects near the edges. Place the setup beside a large window rather than directly in a beam of sun.
Lay the baby on their back. Keep one alert adult beside them and outside the camera frame. Do not use a raised table, balance a phone above the baby, place pillows around the head or improvise a hanging camera rig. The supervising adult can settle the baby between attempts, then move their hands completely out of the frame for each exposure.
2. Make the light even
Face the top of the baby's head roughly toward the window so light travels down the face rather than coming strongly from one side. A thin white curtain can soften hard sunlight. Switch off warm ceiling lights that create mixed color and deep eye-socket shadows.
Take one test frame and inspect both cheeks, the area below the chin and the sheet around the head. If a dark phone or your arms cast a shadow, move the camera slightly farther away and use a longer focal length, or turn the whole setup relative to the window. Our simple window-light guide explains how distance and direction change facial shadows.
3. Position the camera parallel to the face
Have a second adult hold the camera securely above the center of the floor-level sheet, using both hands and a wrist strap if available. The photographer must stay stable on the floor—never stand on furniture, lean over from an unstable position or suspend equipment above the baby. Use the on-screen grid to keep the baby's head upright rather than tilted diagonally. Leave space around the head and shoulders; you can choose the strongest correctly composed frame later.
A second adult can attract the baby's gaze from directly behind the camera, but that adult must not appear. Use a quiet voice rather than a dangling object that may enter the picture or pull the eyes sharply to one side. If the baby turns, pause and reset instead of trying to rotate the face with editing.
4. Focus on the face and stop motion
Clean the phone lens, tap the face to focus and hold the device with both hands. Use plenty of light so the camera can choose a short exposure. Take brief bursts when the baby's head is centered; one sharp neutral frame matters more than dozens of near-duplicates.
If every image is blurred, add light by moving closer to the window or try later in the day. Do not rely on sharpening software to rescue motion blur. The State Department wants a clear original image, and aggressive sharpening can create artificial edges around eyelashes and hair.
5. Keep the full face unobstructed
Remove the pacifier for the photograph and wait until the baby's hands are away from the mouth, eyes and cheeks. Skip hats, bows and decorative headbands. Choose a simple everyday outfit whose collar does not cover the chin. The ears do not need to be forced into view; concentrate on a clear, centered full face.
The official infant allowance is narrow: the eyes may be not entirely open. It does not mean that a side-facing head, blocked face or strongly exaggerated expression becomes acceptable. For toddlers and older children, the State Department says the eyes must be open.
6. Review the original before sizing
Zoom in on the selected frame and check for focus, even color, a complete head, a visible chin and clean edges around the face. Then check the whole photograph for another person's finger, an edge of patterned flooring, a toy, a shadow or a wrinkle that makes the background look striped.
Reject the frame yourself if you are unsure. It is faster to take another untouched photograph while the setup is ready than to repair a weak one digitally and risk an application hold.
Can you crop or edit a baby passport photo?
You should not edit the baby's appearance or digitally repair the setting. The State Department explicitly says not to change a passport photo with computer software, phone apps, filters or artificial intelligence. That means no skin smoothing, eye opening, facial reshaping, hair repair, object removal, color effect or background replacement. Do not combine two exposures.
Size and crop are part of preparing the file or print, but they cannot turn a noncompliant original into a compliant photograph. Follow the instructions for the application method you are actually using and use the Department's own sizing guidance where offered. Do not run a passport image through our AI baby photo editing prompts or the local creative editor.
How to size and print the photo
For a paper U.S. passport application, print one square photo at exactly 2 × 2 inches (51 × 51 mm) on matte or glossy photo-quality paper. In the printed photograph, the distance from the bottom of the chin to the top of the head must be between 1 inch and 1⅜ inches (25–35 mm). Center the head and keep it fully visible.
Do not guess from the preview on a phone. Set the output to the correct physical size, print at actual size rather than “fit to page,” and measure the square and head height with a ruler after printing. If a pharmacy or lab prints the file, select a passport-photo product that follows current U.S. dimensions and inspect the result before submitting it.
Children under 16 use a distinct in-person application process. Review the Department's current instructions for a child's passport under 16 for forms, evidence, parental consent, fees and appointment steps; this article addresses only the photograph.
Baby passport photo rejection checklist
Before you print or leave for the appointment, answer every line with yes:
- Was the color photo taken within the last six months?
- Is the face sharp, naturally colored and evenly exposed?
- Is the full face visible and directed toward the camera?
- Is the expression neutral, with the mouth closed and no pacifier or hand blocking the face?
- Is no other person visible anywhere in the frame?
- Is the background plain white or off-white, without shadows, texture, lines or objects?
- Is the image an original single exposure with no filter, AI or digital alteration?
- Does the print measure exactly 2 × 2 inches?
- Does the printed head measure 1–1⅜ inches from chin to top?
- Did you recheck the official State Department page for any newer requirement?
If the home attempt does not work
Stop when the baby needs feeding, changing, sleep or comfort. The expression and head position do not need to happen on command, and there is no value in extending an uncomfortable attempt. Keep the sheet and try again during another calm, awake moment.
A passport-acceptance facility, pharmacy or photographer may offer photo service, but ask whether it handles infants and how it supports them. Bring the current requirements and inspect the printed result yourself. Professional service can simplify lighting and sizing; the government still decides whether the photo is accepted.
Keep official and creative baby photos separate
A passport photo is an identity document input, not a portrait to beautify. Keep the original file untouched and do not upload it to an AI photo service for styling. If you want a creative travel announcement, make that as a separate image using a different baby photograph.

Never use Totti for a passport application photo
U.S. passport photos must remain original and unchanged. Totti is only for separate creative keepsakes: the iPhone app applies one of 50+ selected portrait templates to an existing baby photo, requires iOS 17.0 or later, is free to download with optional in-app purchases, and can export HD portraits at 2048×2560. Compare any creative result with its source before keeping it.
View Totti on the App StoreThe short version
Use a new, clear color photograph of the baby alone, facing the camera on a plain white or off-white background. Keep the full face visible, use even light, leave the original image untouched, and measure the 2 × 2-inch print and head height. Then check the official U.S. page once more before submitting. For any non-U.S. passport, start again with that country's issuing authority rather than reusing these dimensions.